- Home >
- Web Help >
- SeekerWorks™ >
- My Info/General Info - Follow-Up Paths
My Info/General Info - Follow-Up Paths
Follow Up (Tickler) Paths greatly assist you in your Onboarding process, which is designed to move people along a path from visiting a church to becoming a regular attender, a believer, joining a small group, serving in a volunteer ministry, giving regularly, becoming a member and eventually, a leader in the church.
SeekerWorks™ addresses this process by ensuring the best people responsible for an area in the church are the ones who directly and quickly follow up with those asking for or needing the follow up by giving them a "tickler". Half of the battle is notifying those leaders of each request, which SeekerWorks™ does well. The other half is tracking the effort by those leaders to make sure they don't drop the ball along the way or forget about the requests all together, using regular reminders (ticklers) to stay organized. The other, other half is predefining the various paths and action steps to be followed and performed for each type of onboarding event, shown here. While we've set up for you some basic follow up paths, you'll do well to tailor and expand those for your needs.
The "List Of Follow Up (Tickler) Paths" screen (shown below) appears when you click the (Follow Up Paths) menu button.
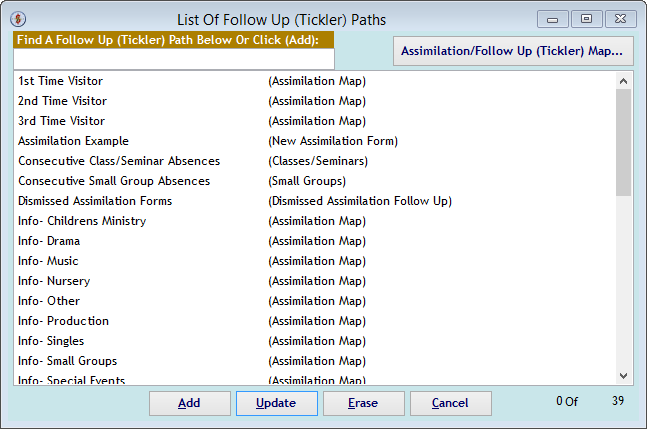
This screen shows a list of all of the predefined Follow Up (Tickler) Paths set up for you when you installed SeekerWorks™. You can click any of the paths to update it, or click (Add) to add a new path. In any case, the "Update A Follow Up (Tickler) Path's Settings" screen appears (shown below). To the right of each path is a column that indicates what trigger(s) are used to initiate it. The (Onboarding/Follow Up (Tickler) Map...) button shows the "Onboarding/Follow Up (Tickler) Map" screen (also shown below), which maps a Follow Up (Tickler) Path to each Onboarding Form check box on the map.
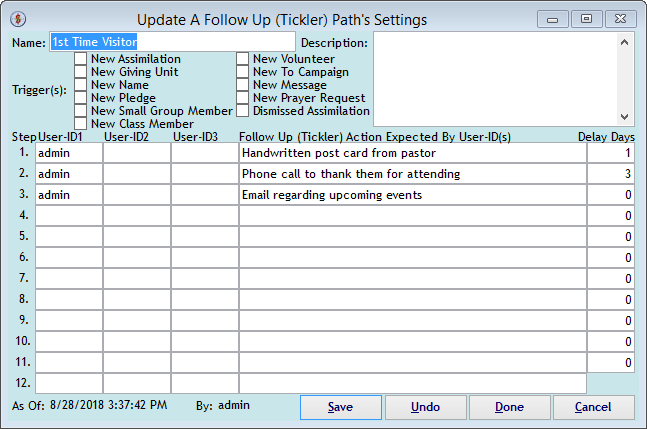
The "Update A Follow Up (Tickler) Path's Settings" screen defines the triggers of the path and the steps to be followed by the users associated with each step, as well as how many days to delay scheduling the next step in the process. <Double-click> any of the three User-ID's for each step being defined to select the user of the person who should perform the action(s) required by the step. If more than one user is linked with a step, they all see the Follow Up in their Tickler File, but it disappears if any of them finishes or dismisses that step.
There are a number of different triggers for a Follow Up (Tickler) Path:
- New Onboarding - All paths with this trigger set are initiated whenever a new Onboarding Form is added.
- New Giving Unit - All paths with this trigger set are initiated whenever a new Giving Unit is created.
- New Name - All paths with this trigger set are initiated whenever a new Person is created, regardless of Ministry Group.
- New Pledge - All paths with this trigger set are initiated whenever a Giving Unit makes any kind of pledge for the First-time.
- New Small Group Member - All paths with this trigger set are initiated whenever a Person joins any small group for the First-time.
- New Class Member - All paths with this trigger set are initiated whenever a Person becomes a student of any class or seminar for the First-time.
- New Volunteer - All paths with this trigger set are initiated whenever a Person volunteers in a ministry for the First-time.
- New To Campaign - All paths with this trigger set are initiated whenever a Person volunteers in a campaign for the First-time.
- New Message - All paths with this trigger set are initiated whenever a new Message is created.
- New Prayer Request - All paths with this trigger set are initiated whenever a Person makes a prayer request for the First-time.
- Dismissed Onboarding - All paths with this trigger set are initiated whenever a triggered Onboarding Form is dismissed.
- Onboarding Map/Onboarding Forms - Each box checked on the Onboarding Form that is also mapped to a path initiates that path.
- (New) Button on Follow Up (Tickler) File For: xxxxx - This manually initiates a path for the person selected.
- Maintain The Ministry Group List - Each Ministry Age Group can initiate an associated path whenever a person is created and assigned to that group. That way, a person overseeing a particular age group can respond when people are newly added to that group
- (Follow Up...) Button on Pastoral Care Entry - This manually initiates a path for a person as a result of a pastoral care event.
- (Follow Up...) Button on Review Message - This manually initiates a path for a person when a message is handled and the need becomes apparent (e.g., a request for information on one of the ministries).
- Attendance Types/Groups - When Attendance By Person is used, a path can be defined that is initiated when people associated have X or more consecutive absences.
- Add/Update A Class/Seminar - Two paths can be defined, one that is initiated whenever someone becomes a student of the associated class or seminar, and one that is initiated when people associated have X or more consecutive absences.
- Small Group Divisions - When Small Group attendance is kept, a path can be defined that is initiated when people associated have X or more consecutive absences.
So, this first example shows the steps to follow when a person indicates they're a First-time visitor on the Onboarding form. Step 1: they should get a handwritten post card from the pastor. One day after that step is finished, Step 2 gets initiated: they should receive a phone call to thank them for attending. Three days after that step is finished, Step 3 gets initiated: they should get an email, if possible, regarding any upcoming events. Once that step is finished, the path is complete and no further action is needed.
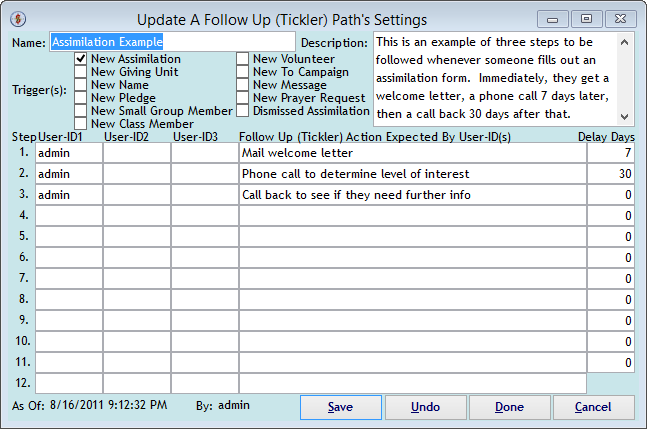
This second example shows the steps to follow when any Onboarding form is created. Step 1: they should get a welcome letter mailed to them. Seven days after that step is finished, Step 2 gets initiated: they should receive a phone call to determine there level of interest in the church. Thirty days after that step is finished, Step 3 gets initiated: they should get another phone call to see how they're doing and if they need further information. Once that step is finished, the path is complete and no further action is needed.
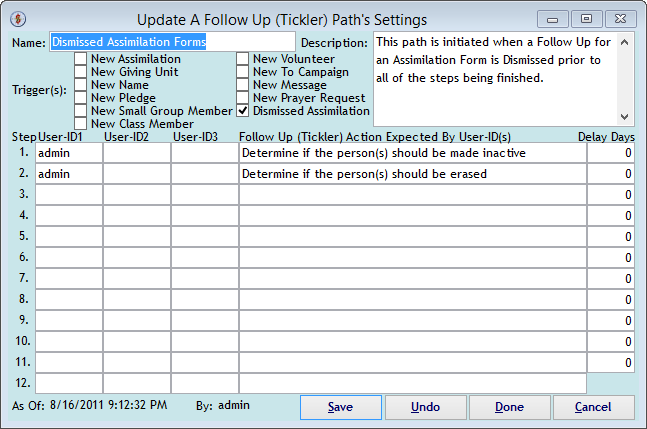
This third example shows the steps to follow when any paths triggered by the creation of an Onboarding form or any Onboarding forms mapped to a First-time visitor, Second-time visitor or Third-time Visitor path are dismissed (as opposed to finished). Since that path was dismissed, the example above would be triggered to follow up on actions that may be appropriate, such as if the person won't be back to the church, or is no longer active with the church, etc. Step 1: someone should research whether the person or household associated should be made Inactive. Immediately after that step is finished, Step 2 gets initiated: if they were made inactive, perhaps they should be deleted all together, so someone should research that as well. Or, perhaps they're duplicate in the database and should be merged into another name, etc. Once that step is finished, the path is complete and no further action is needed.
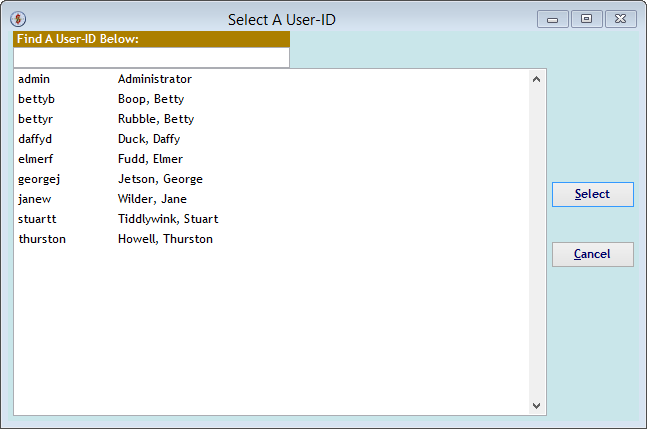
The "Select A User-ID" screen appears when one of the User-ID cells is <double-clicked> on the "Update A Follow Up (Tickler) Path's Settings" screen above. Click a name to select that user to perform the associated step in the path.
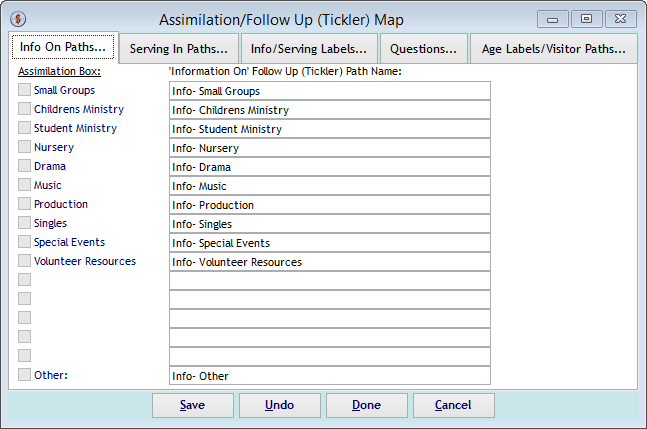
The "Onboarding/Follow Up (Tickler) Map" screen is used to define which path to initiate when the associated check box is checked on the Onboarding screen. The {Info On Paths...} tab maps paths to trigger when someone wants information about that particular ministry on the Onboarding screen. <Double-clicked> a path cell to select a path from the list.
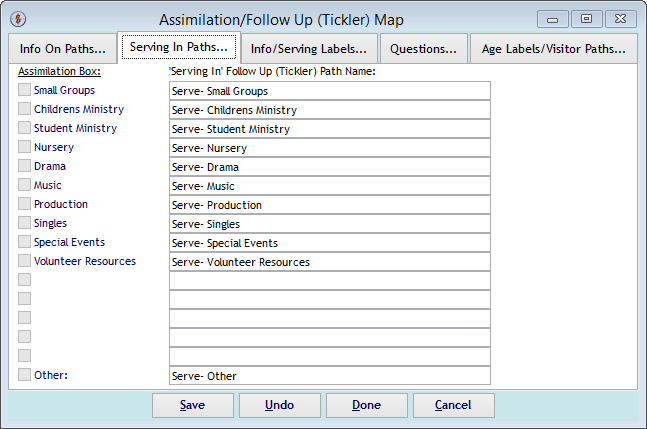
The {Serving In Paths...} tab maps paths to trigger when someone wants to serve in that particular ministry on the Onboarding screen. <Double-clicked> a path cell to select a path from the list.
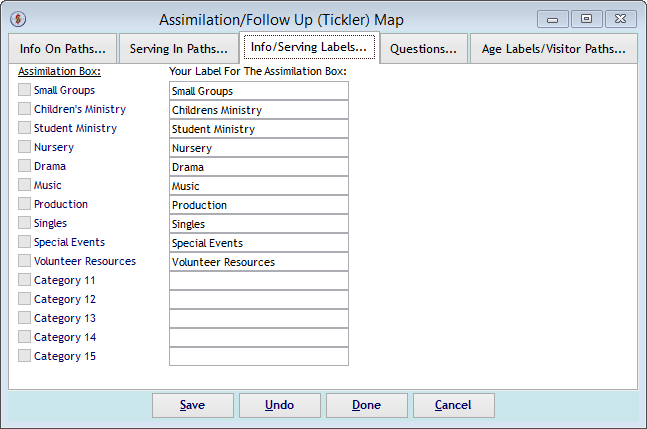
The {Info/Serving Labels...} tab is used to change the default labels for the associated check boxes (e.g., "Small Groups" should be called "Cell Groups" instead, or "Music" should be called "Creative Arts" instead).
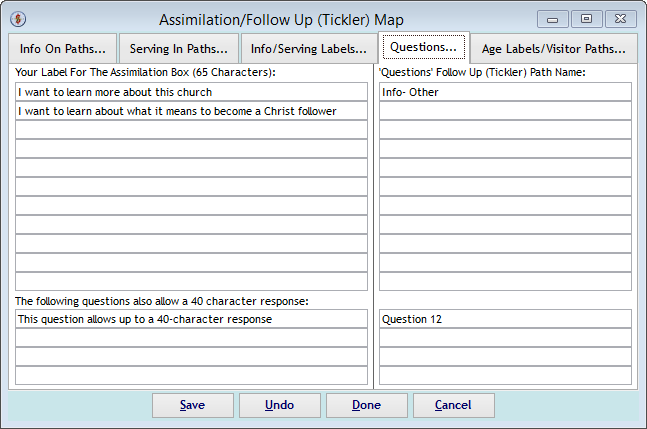
The {Questions...} tab is used to define any questions or any other check box you want to show on the Onboarding screen and the path that should be initiated when that check box is checked. If someone can put responses on the Onboarding form, use one of the four paths at the bottom to allow up to 40 characters of response to be saved on the Onboarding screen.
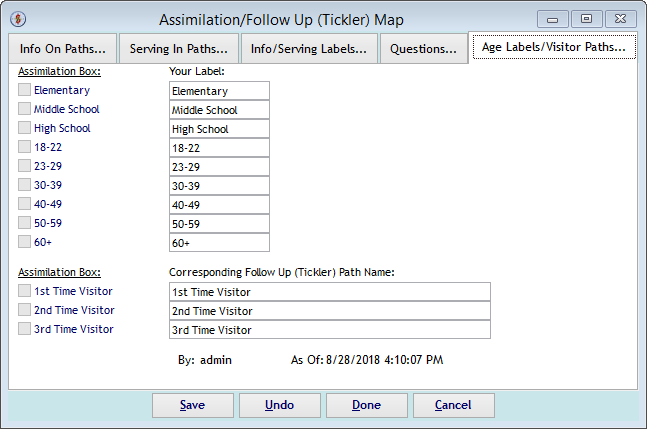
The {Age Labels/Visitor Paths...} tab is used to change the default labels for the associated Age check boxes (e.g., "Middle School" should be called "Junior High" instead, or "18-22" should be called "College Age" instead). In addition, you can map the paths to initiate whenever the First-time, Second-time and/or Third-time Visitor boxes are checked on the Onboarding form.
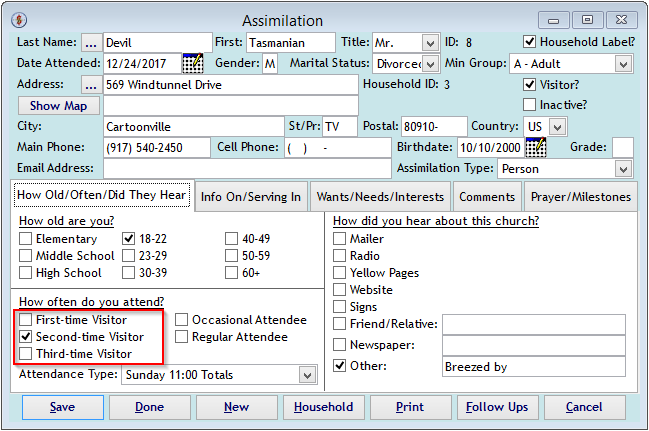
As mentioned above, the First-time Visitor, Second-time Visitor and Third-time Visitor boxes trigger any paths mapped to those boxes on the Onboarding Map.
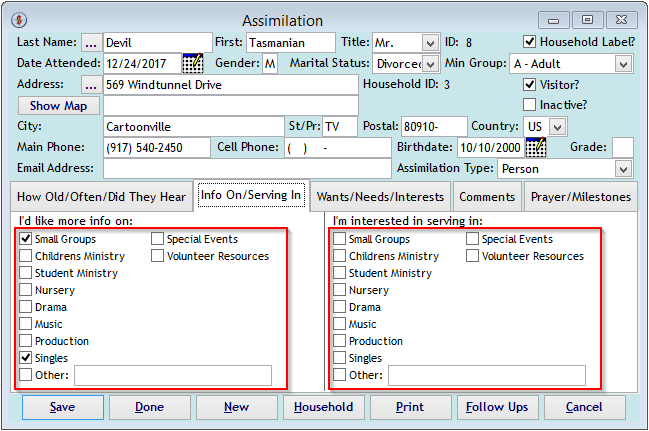
As mentioned above, the "I'd like more info on..." and "I'm interested in serving in..." boxes trigger any paths mapped to those boxes on the Onboarding Map.
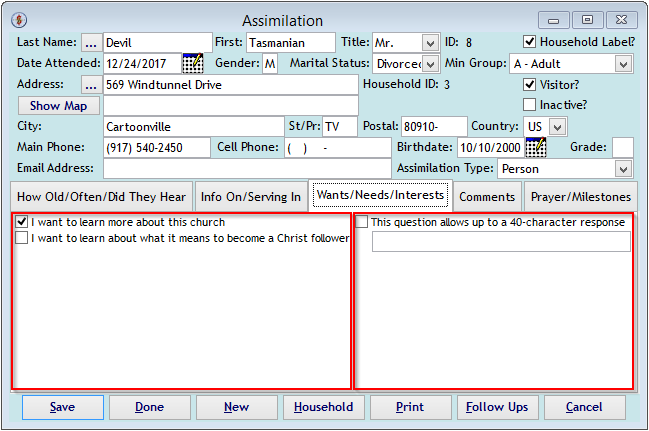
As mentioned above, the "Questions" boxes trigger any paths mapped to those boxes on the Onboarding Map.
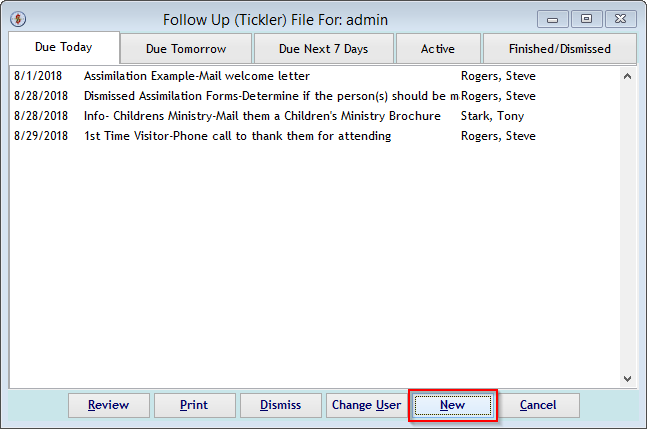
As mentioned above, the (New) button on the "Follow Up (Tickler) File For: xxxxx" screen will manually initiate a Follow Up (Tickler) Path.
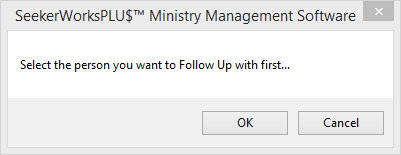
Click (OK) to select a Person to follow up with.
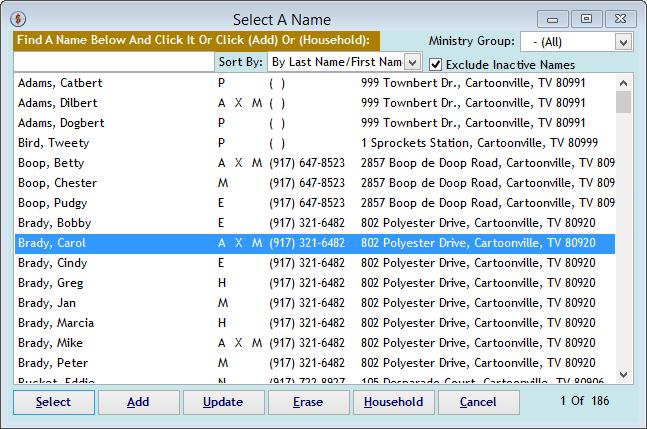
Select the person you want to follow up with.
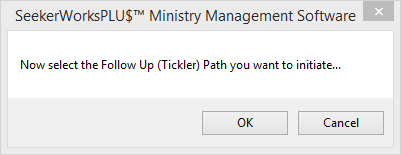
Click (OK) to select Follow Up (Tickler) Path you want to initiate.
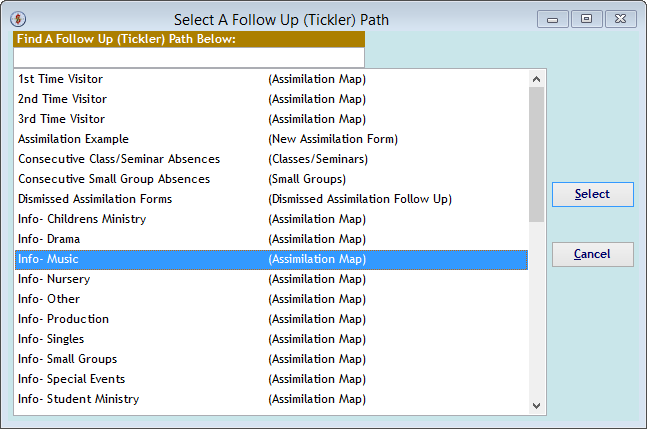
Select the Follow Up (Tickler) Path you want to initiate.
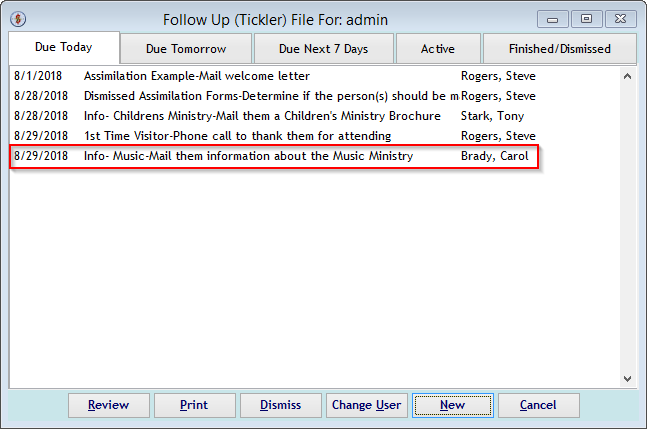
The "Follow Up (Tickler) File For: xxxxx" screen now shows the manually triggered path.
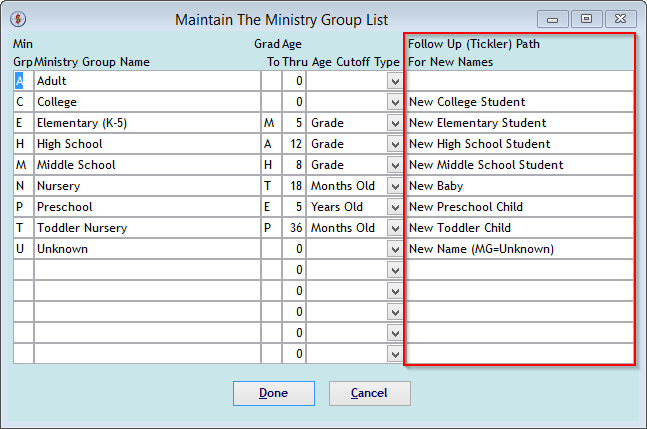
As mentioned above, the "Maintain The Ministry Group List" screen triggers any paths mapped to the associated Age Group when new names are created in those groups.
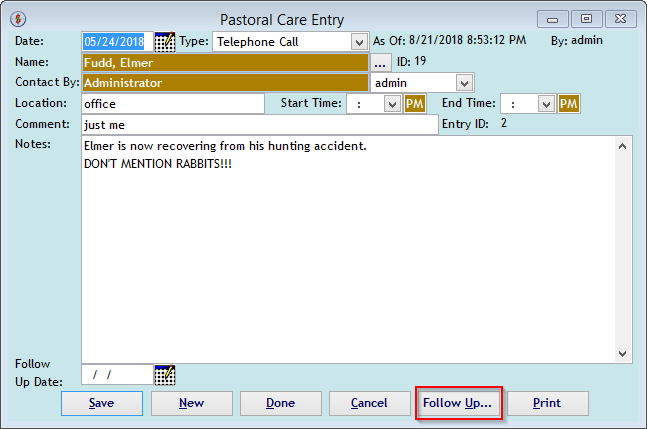
As mentioned above, the (Follow Up...) button on the "Pastoral Care Entry" screen will manually initiate a Follow Up (Tickler) Path.
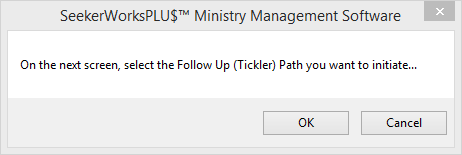
Click (OK) to select Follow Up (Tickler) Path you want to initiate.
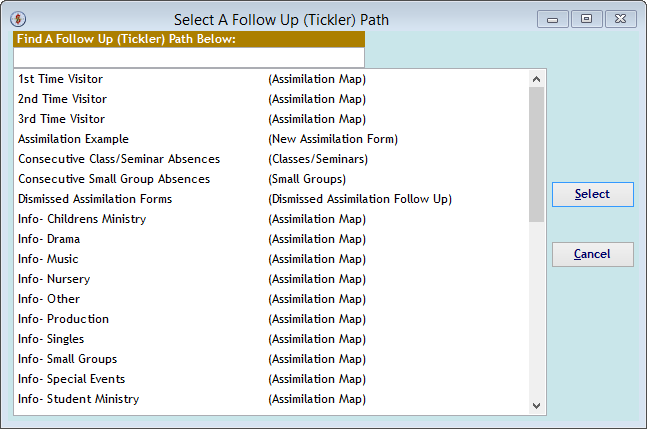
Select the Follow Up (Tickler) Path you want to initiate.
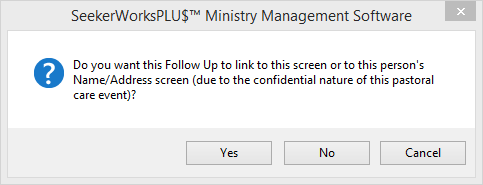
Click (Yes) if this Follow Up (Tickler) Path should be visible on the Person's Follow Up list or (No) if it should remain confidential.
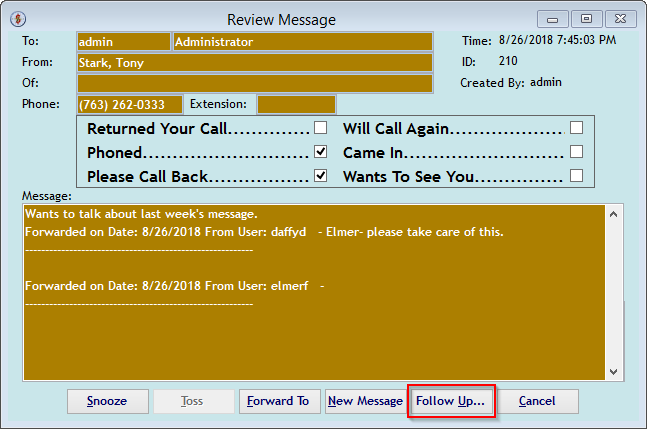
As mentioned above, the (Follow Up...) button on the "Review Message" screen will manually initiate a Follow Up (Tickler) Path, similar to the screens above.
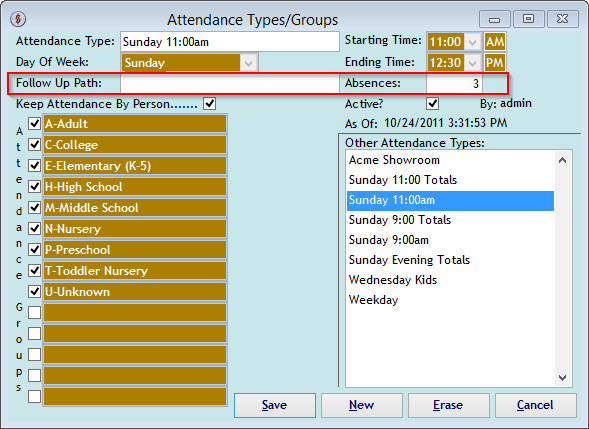
As mentioned above, the Follow Up Path text box on the "Attendance Types/Groups" screen will initiate a Follow Up (Tickler) Path when people have X or more consecutive absences and Attendance By Person is being used.
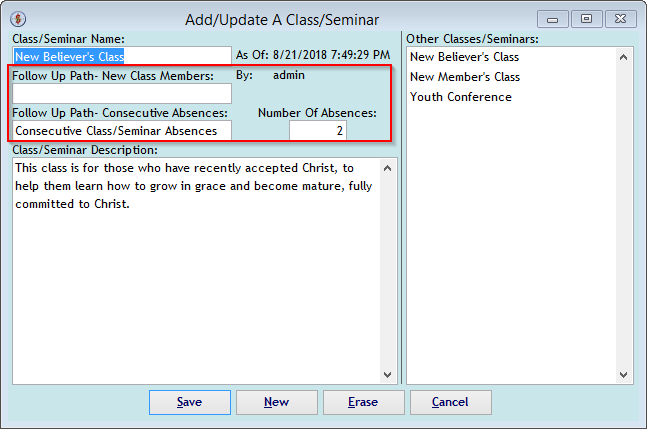
As mentioned above, the Follow Up Path - New Class Members text box on the "Add/Update A Class/Seminar" screen will initiate a Follow Up (Tickler) Path when a person is added as a student for that class. In addition, the Follow Up Path - Consecutive Absences text box will initiate a Follow Up (Tickler) Path when people have X or more consecutive absences and class/seminar attendance is being used.
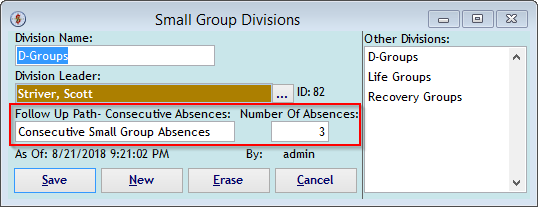
As mentioned above, the Follow Up Path - Consecutive Absences text box on the "Small Group Divisions" screen will initiate a Follow Up (Tickler) Path when people have X or more consecutive absences and Small Group Meeting attendance is being used.
Right side navigation links:
More Screens:
People:
Gifts/Pledges:
My Info/General Info:
Follow-Up Paths